aka: Is That Asbestos?
When faced with any overwhelming project, such as my income tax returns, the outline for a novel, or say…
…a vintage trailer makeover that turned itself into a full-on, bones-out, ground-up restoration, I’ve found that it’s best to start with the easiest, most obvious things first.
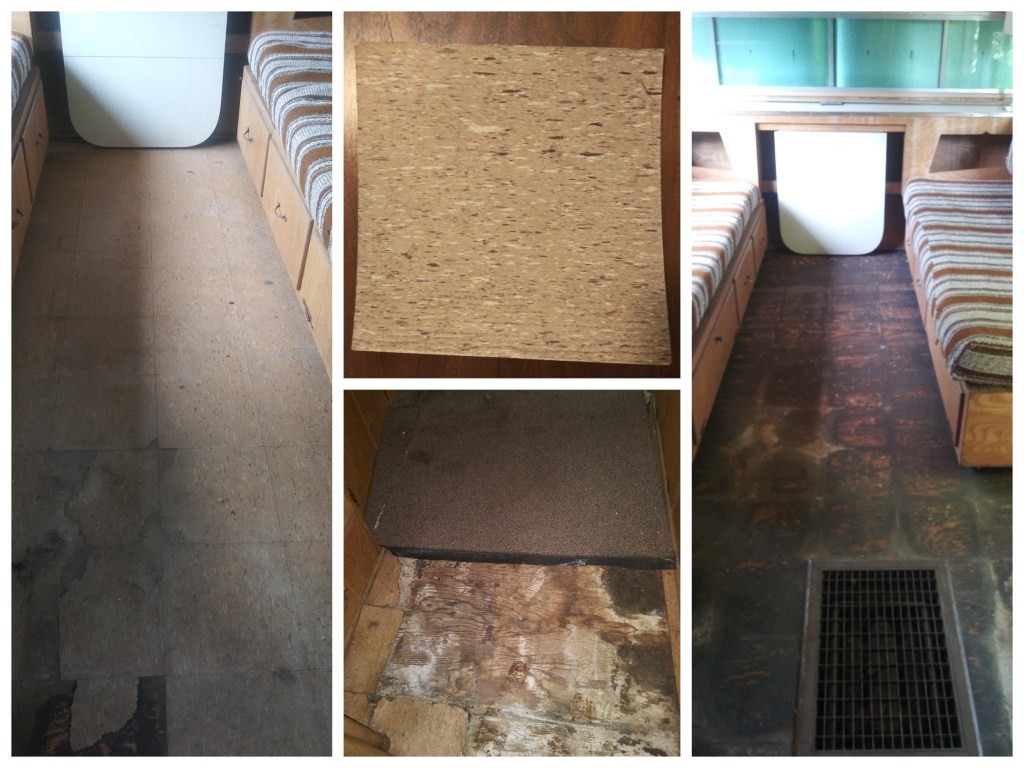
In the case of my taxes, for example, I tackle my name, SS # and home address right out of the shoot. (I’m just brave that way.) In Petunia’s case: 57 year-old pink linoleum floor tiles took the prize. They absolutely had to come up first and foremost.
Many of the visible tiles (peeking out from under the random carpet-remnant-come-throw-rug) were peeling up at the edges and seemed like they’d be dislodged by a good healthy sneeze.
Famous last words.
Getting those tiles up ultimately required a hammer and a chisel. I’d have tried a jack hammer if I’d had one handy. While some tiles popped right off, many-many-MANY were welded to the floorboards with some sort of black tar-like goo that had hardened to roughly the strength and density of the earth’s core.
I decided to Google “easy ways to remove linoleum from floors” for some inside secrets. What I found instead was the nasty word “asbestos.” This is after about four hours of chiseling up tile, one speck at a time, inside a poorly ventilated, 150 square-foot tin box.
I’m an idiot.
My entire project halted for a week while I waited an asbestos test kit from Amazon. When it arrived, I put on a face mask (accessible and handy these days) and collected a sample. What had originally looked like dark tar from the earth’s core now looked to me like toxic remnants from Hell.
Another week and $37.50 later, and Petunia was deemed “asbestos free.”
Yeah baby! I still needed the hammer and chisel to get all the tiles up, but at least I could do it without tiny particles of death accumulating in my lungs. (Never in modern history has it been more evident that we all need super-healthy lungs, right?)
Next easiest job: cabinets and drawers. One Phillip’s screwdriver and I was off to the races.
An Inventory:
- 15 Cabinet Doors
- 11 Drawers
- 33 Hinges
- 4 Latches
- 12 Knobs
- 10 Pulls
The Treatment:
Hinges, latches, knobs and pulls needed to be soaked and polished, scraped and buffed, and–in some hardcore cases–doused with WD-40.
Doors and drawers needed to be sanded, then mended with wood filler where necessary (like everywhere), sanded again, masked, primed, primed again, sanded again, and painted. And painted again. (Remember “Freshly Cut Stems” from the Magnolia Home Collection? This was paint’s big moment!) Final To-Do: Line them all with shelf liner and store them neatly away until the day comes when they can be restored to Petunia’s interior.

voila!…the doors and drawers are ready for their fittings.
When it came time to get 15 doors, 11 drawers, 33 hinges, 4 latches, 12 knobs and 10 pulls out of my living room and into a safe place, I was baffled. If I get so much as one ding or scratch on these babies, I might just have a meltdown. (Not that that‘s ever happened before.)

The doors ended up stacked the the shower stall inside Petunia. The drawers are tucked under a sheet in the garage. (Lord only know when I’ll actually be able to park my car in there again.)
Now then: Moving on to the walls! (Aka, is that black mold?) I need to tear out the existing wall and ceiling panels, repair and replace the birch wood as appropriate, and replace the 57 year-old old insulation.
Winter is coming…

awesome progress
Thanks Ken! I”m channeling my inner “Gramma.” That lady had gumption!
Love it!
😎😍
Sent from my iPhone
>
Cliffhanger!